Wednesday, November 17, 2010

Art Is Around Us!

Paper Bag
I found a very interesting bag in my house. I believe kids will love it because it is so cute and adorable. Wonder if you agree with me. Take a look :


Isn't the bag cute? (sorry, I did not rotate the picture )


The side view. (Did not rotate picture again!)
 Of course, Snow White loved the bag and the chocolates in the bag too. I did not throw away the bag, still have it in my store room. I am thinking of creating one such bag with Snow White  much later because it involves a fair bit of cutting. The following is how I can do it:
  • Get a paper bag ready, a small one will do.
  • Next draw a picture , colour  and decorate it. Have to do double , one for each side of the bag. For a start, I think it is easier to start off with pictures on animals or food (like a big hamburger)
  • Cut out both the pictures. Paste each of them onto a hard cardboard. (We can use the backing of the drawing block etc) Then cut out the cardboard with the picture pasted on it.
  • Finally, stick the 2 cardboard pictures on each side of the bag.  Done!
Sounds pretty easy, I think this craft may be more suited for 9 years old children. I like this idea very much because we do not need to spend much money as we are using recycled bags, cardboards etc. It is ENVIRONMENTAL FRIENDLY!


Paper Boat
I also found a few crumbled paper boats in my living room !Obviously, my kids had crushed them after getting tired of playing with them for a day. My domestic helper had made them for my kids and they reminded me of my childhood. I have seen my neighbours playing and letting the boats drift down the drains. I did try making one, but it was a flat one . My helper made a standing boat! I was impressed and asked her to show me how to create. She used a page from the magazine, so the boat turned out to be colourful and when I placed it in my baby's bath tub, it did not sink. I felt so satisfied. As for my own kids, I think I will teach them at a later stage. Right now, I will make for them if they want.

I have taken pictures on how to make the boat, but some do not have the explanations, just try and imagine if you are attempting.

Take a page from a magazine. Fold it into half.

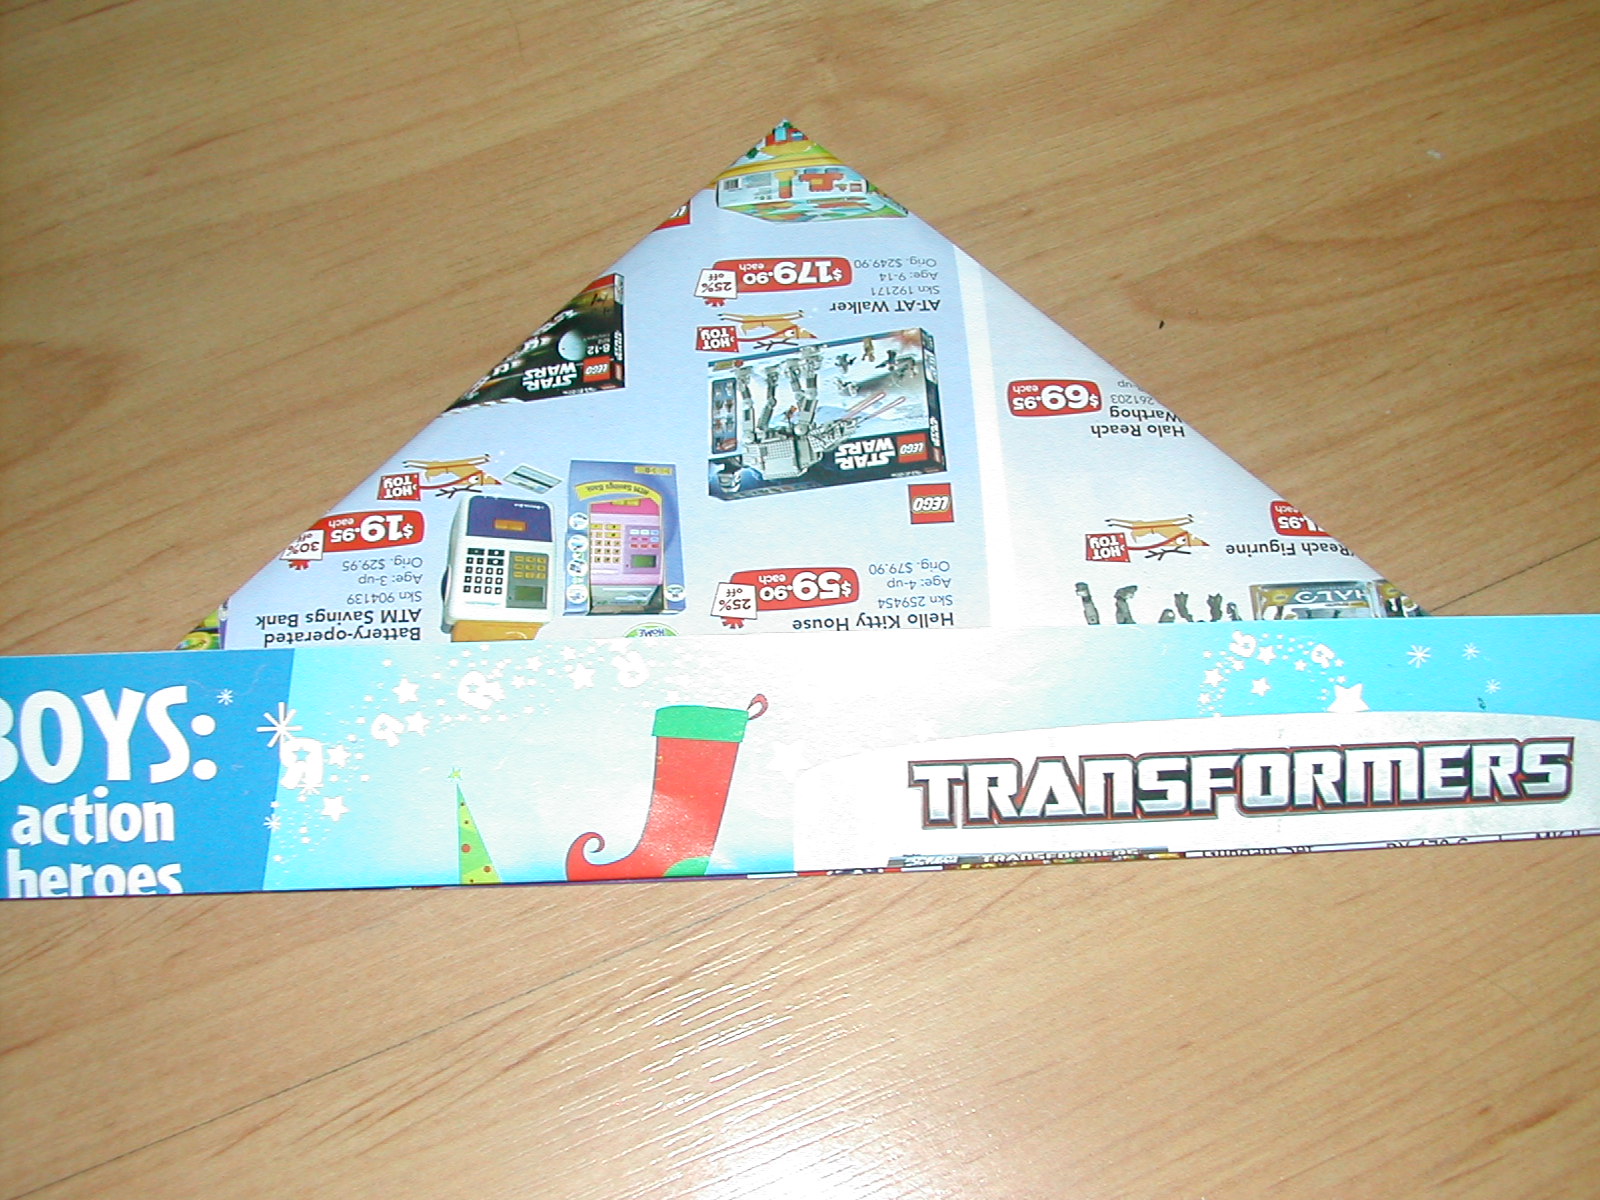
Bring down the 2 corners to form the triangles. Then fold up the bottom.
                                         
Flip over and fold up the bottom too. 
                                         

Open the bottom as shown.

                                                                      Flatten it.
                                          

                                          Open it up. I find this step to be the most difficult. (If anyone has a clearer    image/direction, please offer your help.)


                                         The standing boat!


This art of paper folding is known as origami. I have tried making paper balls as a child but have forgotten how to fold them now. There are websites available that teach origami, some can be really easy, but to make cute paper figures/animals---the steps are numerous and often, I find it tough to follow it.

'Glow In The Dark' Art Painting

Just last week, we went to a fun fair like event held near a shopping centre in our country's shopping belt. It was to raise funds for the less fortunate children and we had a stack of coupons with us. The weather was hot but luckily, the place was sheltered. There were many games stalls, of which, my kids only took interest in  two of them. We spent almost half of our coupons on games. I had some coupons left and so went over to a few stalls that were selling 2nd hand stuff. This was what I found and it cost me only a dollar and it was brand new.(Just that it had been bought quite some time ago by the owner and the paint in the package might have dried up)

                                        It was a 'glow in the dark ' piece of painting for little kids. The only regret is that I did not buy another set for my Cinderella, so only Snow White got to do the painting and she was rather unwilling to share.

Instructions were provided behind the package. It was easy, just add a bit of water to the paint and it was ready to use. Applying the colours seemed to be more challenging. As you can see the paint brush provided(the green stick), it was very small and when painting, you have to keep dipping into the paint. You could not
add too much water or else the paint would not 'stay' on the plastic and if you added too little water, the paint became too thick., the application was not smooth. And for those small little patches, we used toothpicks to fill in the colours.

                                         Snow White applying colour. The purple colour had dried up already, so she had only 3 colours to choose from.


                                          Snow White using a toothpick to appy colours to the small patches.


                                         The completed work.


                                          Attached a string for her to hang in the room.

Should have asked Snow White to colour the border too. But she was already very happy with her effort. When the paint had dried, we waited till night time to show her the 'magic' .My 2 kids just 'Wow and wow'!

By the way, Snow White actually asked me what were those characters after the painting process. I had assumed that she could at least recognise the witch. Another learning opportunity! I gladly told her that one was a monster and the other a witch. She preferred the monster to be a dragon, or a wolf. Perhaps, I should also mention about Halloween since it was October. Just did not think of that at that time.

Crepe Paper Art

Art Work using Crepe Paper
I have been doing a bit more crafts with my kids now since the drawing aspect is taken care of by the Art School that Snow White is attending. So I am looking out for some inexpensive crafts that I can conduct with Snow White. Sometimes, when we run out of ideas, it will be good to make a trip to the bookshop. That was what I did and saw crepe paper that cost me a dollar.

Cutting and Rolling
I decided to ask Snow White to draw a huge shape on the paper. She drew a heart and said that she wanted to give it to her teacher. Next, I cut out small strips of crepe paper, about 0.5cm in width and asked her to roll into tiny balls, make sure she squeezed it tight. Thought it was rather simple, but can be difficult for a 4 year old kid. Indeed, I started off by giving her a strip of paper that was 1.5cm in width and 15cm in length . It was not successful , she could not roll and squeeze to tighten the crepe paper into a ball. When she pasted the crepe paper onto the heart shape, the crepe paper 'dangled' out. It was awful looking and so I plucked them out and decided on trying the 0.5cm width and 15cm length strip of crepe paper. This measurement was so much better. Be prepared to spend time beside your child to roll and paste.  Snow White was quite tired,  I let her take a break.

Another tendency is that Snow White would paste anywhere that she like within the heart shape. I thought this was OK till much later, I discovered that there were many gaps in the shape. Some gaps were big and others were small. I had to ask her to patch up and was not easy. You have to frequently hold up the picture to check that the gaps were covered up, then placed down and checked again. A better way is tell your child to start pasting the balls from the outside , then move towards the centre of the heart or vice versa. In such a manner, work will turn out to be tidier.


This activity looked pretty easy, just need some planning. I also enagaged my second child, Cinderella, to do it too. She's two and a half years old and would just roll without squeezing the paper into a ball. She had fun though she did not complete hers and there were many more gaps in her picture.

                                         The heart shape that Snow White drew before pasting.


                                         I tried cutting the strips into different widths and lengths.


                                         My 2 kids completing their Art.


                                         Cinderella squeezing the glue on the paper. She enjoyed this step very much. Can you see that she did not roll her paper properly into a ball? (She did try, I think this is more important than seeking perfection)

                                    
                                          Cinderella's completed work. (I drew the star for her.)


                                    Snow White's heart. Glad at last, I can see the heart though there are some gaps still.

Batik Painting

In July this year, I was put in charge of running a stall organised by my school vendor. It was a Batik event. It was my first time doing quite a fair bit to get the stall up and running.

Creating A Batik Painting
By the way, Batik is a form of Art that originates from Indonesia. Basically, you have to get ready a pot of wax, a tool (known as 'janting' (my spelling is not so accurate here, sounds something like this))to help to apply the wax on the pictures drawn, a piece of white cotton cloth or silk cloth, a frame and Batik paints to start your work. Just to give readers a better idea, this is roughly how it works.

  • Staple the cotton cloth onto a wooden frame. This is to 'stretch' the cloth and make it easy to apply wax and colours. This will also ensure that the cloth will not stick to the table after waxing and when colouring, the batik paints will not stain onto the table.
  • Next, boil a pot of wax, dip the janting into the wax. This tool actually collects a little bit of the liquid wax and when you hold and press it on the cloth, the wax will flow out. Trace the picture on the cloth with the wax by using the janting.
  • Do note taht the wax is hot and be careful not to scald your hands/fingers. So kids must be guided by an adult and not leave them alone to complete the job.
  • Then wet a small portion of the picture by using a brush. Dip your brush into the paints, and colour on the wet portion. The colour will run and spread very fast and beautifully. You can get different shades too.
  • Dry the cloth under the sun.Be careful not to let your cloth get wet as the colours can 'run'. If you want it to be permanent, you need to buy a fixer to apply on the cloth.


Back to the Batik event, we have parent volunteers who sewed up the Batik pieces done by pupils into cushions, bags etc. Then these products were sold to the public and funds raised were donated to an old folks home. On the last day of the sale, I actually took my whole family to support the event. Snow White was actually very attracted to a stall that allowed anybody to have a try on Batik by painting on the cloth. Of course, no waxing. Many kids tried and I could see many happy faces.


Snow White selected a picture on Orhids. She painted on the spot under the guidance of an adult who ran the stall. As the place was a shopping mall, her piece of Art work was dried using a hair dryer.

                                         This is Snow White's completed Art Work. (Sorry, did not rotate properly for your view. ) The colours can be much more attractive than this. I left it to Snow White to apply any colours that she wanted. (You do not need alot of paint for this picture, the Batik paints are very watery, a big bottle of paint can go a long way.)
                                         A closer look. The white lines are traced using the wax. 

After drying, you can actually feel the thick outlines of the wax and if you do not remove the wax, it will crack and drop out bit by bit. So place your cloth below a thin stack of newspapers.Then iron on it, you can see the wax melt and stain on the newspaper like below:

                                          Can you see the melted wax on the newspaper?

Art and Crafts

A Craft Book
I have been doing a little more shopping lately, especially looking out for some books for myself.  I took Snow White along to a bookshop and she picked up a craft book. It comes with a pair of plastic scissors and basically is about cutting and joining up or glueing the parts/ ends. I do find it a bit tough for a 4 year kid but the end products -if done correctly- can be interesting.
Developing Cutting Skills
I think Snow White wanted the scissors more than her interest in the activities. Anyway, I paid for the book and excitingly, she started working immediately upon reaching home. It was quite a disaster. She could not handle the scissors and kept complaining that she could not cut the paper. But it is quite true, you need to hold correctly before the paper can be cut through. The good thing is this pair of scissors is quite safe, the blades are made of plastic. I had to hold her hands and cut together with her, tough job! By the time we had finished cutting, her patience had run out. I was tired too. She refused to continue with her work and had lost interest. I could not get her attention and so I called it a day. I tried again the very next day, this time, I demonstrated how to piece the different cuttings together, asked her to glue here and there and finally created our product. Snow White was happy.
Subsequently, she tried a few more pages on her own. Each time, she would ask me where to cut, despite telling her numerous times that she must cut along all the dotted lines. Her cutting was not neat. I supposed it must be quite difficult to use that pair of plastic scissors. She even requested for the metal blade type of scissors that we usually use.
You can see from below how the page looks like.
                                 Art and craft page for my kid, taken from the craft book,       
                                   I    trimmed away some sides for easy handling.


Can you see her cutting skills?
This is the best that she can cut. I think Snow White is afraid of making mistakes. In one of the pages, she actually cut into the picture and was quite upset. So after that experience, she would cut the figures a bit further and not so neat. Think I must give her lots of encouragement.
After cutting, the next instruction is to glue the stripes to the watch. I had to help her by teaching her where to apply the glue. The stripes, however, detached from the watch a lot of times. Maybe the glue was not strong enough.  I resorted to stapling instead. Snow White was happy and wore the watch the whole day. My other 2 kids took turns too, be prepared, by the 2nd day, the whole watch came apart. They were too rough with paper products.

                             The finished products. My 2 kids were wearing them on their wrists.


                                        This page shows us how to make a box.


                                          This page shows how to make a pair of spectacles.


                                  This page shows us how to make a mobile.

 There are many more colourful and interesting pictures in the book that can be made into beautiful items. (Like what you see from above). Right now, I am keeping the book away for a while as I feel that the remaining pictures are too difficult for my kid to cut them out. Instead, I am now drawing  pictures or finding a huge picture from magazines and ask her to practise her cutting skills on these pictures instead.

Tuesday, November 16, 2010

Art Schools

Importance of Art Schools
As mentioned previously, I sent Snow White to a few trial Art lessons which she did not enjoy. I still believe that proper Art lessons are important :
·         where kids can acquire the right artistic knowledge and concepts.
·         They can draw inspirations from the teacher who will guide and develop them and let the children experience different forms of Art (which I may not be capable of producing as effectively for them).
·         Moreover, my kids will be learning in a place where all share the same interest and passion in Art, they can exchange ideas.
·         The kids are engaged in active thinking, forcing him/her to reason and act accordingly what is best suitable in a given situation.   
After saying all this, I did not mean that what I did with her at home was useless, these home based Art lessons serve to enhance her love for Art.

Hunting For Art School
Now back to hunting for a school for Snow White…..When looking out for a suitable school, you may want to check on the teacher’s  qualifications, teaching styles, the content being taught, the duration, any provision of art materials (or do I need to source materials for my kids?), individual attention or group teaching ?... etc. After finding a suitable school and having started lessons, perhaps and very important too, observe and ask ourselves : Can the teacher connect with my kid? Is the teacher nurturing such that my kid looks forward to the lesson every session?   

The Start Of Proper Coaching…
After 2 months of searching, I found an Art school and enrolled her for the junior Art lessons once per week, 1.5hours for each session. I did not need to prepare anything for everything was provided by the school. It is a small group teaching, so far she had attended 6 lessons. The first lesson was drawing a flamingo, the teacher would show pictures, talk a little about the animals and the shapes. From there, the pupils would draw. Next, they talked about colouring and guided the pupils in using the brush and paint.  Snow White produced quite a decent piece. Subsequent lessons, she was drawing owls, elephants, a girl, a boy etc. Most importantly, she enjoys the lessons.

A Little Evaluation
I heard that by the end of the 10 lessons, the school will give them a little test to see if they remember their skills learned. It is the school’s way of evaluating their pupils. It is done in quite an interesting manner. Each pupil will be asked to draw on a given canvas , (topic will be released only on that test date) so that it can be brought home to be hung or displayed. Can’t wait to see what my kid will draw.  Actually I am more excited by the idea of getting the canvas home than what she is going to draw. Just imagine how proud my child will feel with her piece of Art work being hung on the wall, it can really boast her confidence!

Another Way Of Enhancing Creativity

Observing Our Kids
One way of enhancing our kids’ creativity is to first examine how our kids see things around them. What do I mean by this? Once I took my kids to shop for curtains (My Snow White was 3 years old at that time). I found a pretty floral curtain suitable enough for the kids’ room. I was about to pay for it when I just popped a question and asked Snow White if she liked it. No answer from her but instead she ran to grab a curtain with cute soldiers and animals prints on it. Then I looked and starred a while, trying to ‘see’ the beauty of this curtain selected by my child. The curtain was not that matching such as the background colour of the cloth although the prints on it were quite alright. Obviously, Snow White must have loved the printed soldiers and animals , something that she can relate well( I have been reading many stories to her since she was 2 years old.) I did not buy the curtain and threw her idea aside, she did not show much disappointment and I paid for the floral curtain.  Somehow, this incident made me think a few times whether it would be better to buy her selected cloth. Slowly, I realised that since her interest is on animals and stories characters, develop her interest! Let her be surrounded by these things (of course , it needs not be too overwhelming). So what appeared so ordinary to me can be seen differently by a child.

As my kids grow bigger now and whenever, they stop and look at something interestingly, I would also pause my footsteps and examine the things together with them. It helps me in many areas. For example, Snow White likes butterflies, I would just read stories which have  butterflies  being mentioned in the book. Once I drew her a butterfly as requested by her and  when she applies colours to the butterfly, she immediately painted a colourful one for me. She also told me that she has seen butterflies with circles on the wings that look like ‘eyes’ and is very scary to her. So I told her a little that these ‘eyes ‘ protect the butterflies from being eaten up by enemies and also that in future, she may include these ‘eyes’ in her butterflies to create patterns on the wings. She said, ‘ok’. I just have to wait and see…. Not only that,  her interest is spilled over to Science, where she can tell me orally about caterpillars and cocoons.

Developing A Child's Creativity In Art

How I Develop My Children's Interest and Curosity in Art
In the process of developing my kids’ artistic skills, I try my best to expose them to various art forms. Going to museums is one good idea. So far, I took my kids for one such visit only. On that day, the museum was very crowded because admission was free. On other days, we have to pay for entrance fees. We walked around the place, pointing out the old artefacts, figurines and how attractively they were put up for viewing. It will be good to ask them for their views of the things they see, but I did not do it simply because I forgot to, and I was busy looking through the exhibits too. I did not want to miss out anything, (let me tell you, my first trip to the museum was when I was 8 years old,  30 years later, I made my second trip with my kids!)   I do not know if my kids know much as we pointed all these to them, they seemed to enjoy the trip.

Sadly to say, one trip is not enough. Our weekends are always filled with activities, we do not have time to bring them to museums again. Still I try to bring them out during one school holiday per year.(That’s my goal) What I do nowadays is to keep a look out for artistic things around us when we go out shopping, travelling on the bus, walking in gardens etc. In other words, if I happen to see a sculpture, I will tell her what the figure symbolises, ask my kids to imagine what the artist do to bring out his/her ideas. What shapes did the artist use? If I come across a fountain, I would ask my kids to look at the sprays (tell them it is like their drawings of lines-straight, curved, zig-zag etc).Then I took a picture of our family in front of the fountain for remembrance. During National Day and Chinese New Year celebrations, we would bring the kids out at night to a park (near where the celebrations were taking place). There, we would enjoy the fireworks! The arrays of colours are so fascinating! The fireworks are forever so captivating . Here, we can teach the kids constrasting colours against the dark sky.  In such a manner, I try to spark my kids’ imagination, bring out their creativity and develop a passion for Art and appreciating the things around them. I may not be seeing any results now, hopefully, as the years go by, she will develop to become a little artist
 Art Displays In School
So much being said about Snow White ‘s drawings in school. It is also comforting to know that the school puts up children’s drawings around the classroom and at reception area no matter how bad or untidy the drawings are. The displays are changed frequently, according to themes as well as when important festivals are celebrated  in the country. The children’s drawings just make the place so alive, so colourful, it is almost like stepping into fairyland, and bringing memories of your childhood. As a child, my teachers did display our Art pieces too, but only selected pieces, usually the well done ones.  Hence, when I saw Snow White’s drawings being displayed, I felt so proud of her. I would never fail to bring to her attention whenever her piece of drawing is put up. Perhaps as a result, she treasures all her masterpieces very well, keeping every single piece in a big folder. I think I have to get her another new folder soon.

Talking About Art
It is after the display that the children are allowed to bring their art pieces home. By doing so, children take pride in their work and feel proud of themselves. The school also goes one step further by engaging children in discussing about their art. For example, one month before Mooncake Festival, the pupils had already started to make simple lanterns for the celebrations. Although each child had the same lantern but each could paste/colour their favourite objects on it. The teacher would discuss with the child and ask them why they had chosen that particular object/colour. This is an effort to make the child talk or verbalise , hence developing his or her oral skills too. What a good way to nurture children’s interest and appreciation for Art.  After learning this from the teacher, I also learned to talk to my kids before drawing and after when she had completed the whole process. (At home, you may want to play some music you’re when your child does her/his drawing. )Try it out, you will be amused and amazed by their reasonings. They are afterall kids !